Why a laboratory cut-over is different
In most departments a system change can be scheduled around the work. In a laboratory the work does not stop. Specimens keep arriving, clinicians act on results within minutes, and every analyzer, label printer and report is wired into the old system. A migration that is planned by calendar date alone puts the bench, and the patient, at risk.
The aim is simple to state and demanding to deliver: at every moment during the change, a specimen can be collected, identified, analysed, verified and reported, and the clinician can trust the result. Everything below serves that aim.
Phase 1: inventory what the laboratory actually does
Start by recording how the laboratory really works, not how the old system was configured years ago. Walk each bench with the people who run it.
| Area | What to capture |
|---|---|
| Test catalogue | Codes, names, units, specimen types, panels, reference ranges and critical limits |
| Instruments | Model, protocol, connection, test code mapping and who maintains each interface |
| Workflows | Collection, labelling, receipt, rejection, add-on tests and send-outs to reference laboratories |
| Reports | Result report layouts, cumulative reports and the languages they must appear in |
| Interfaces | Ordering systems, billing, payers, reference laboratories and exchange platforms |
| Users | Roles and who may verify and release results |
| History | What must be migrated and what stays readable in the old system |
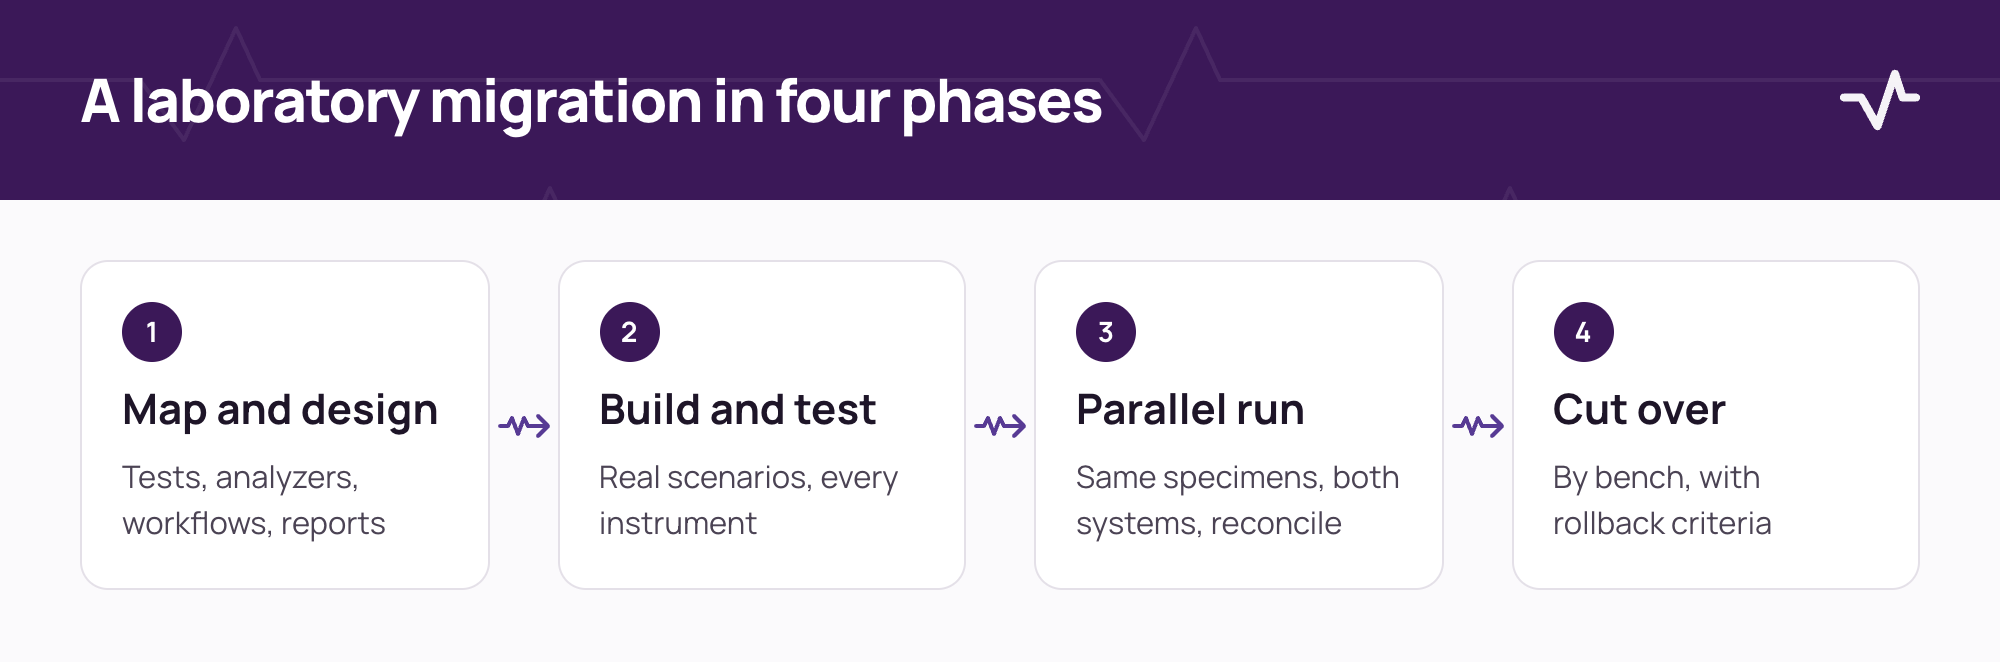
Phase 2: build and test with real scenarios
Test against the way the bench works. A catalogue that loads without errors is not the same as a catalogue that gives the right result for the right specimen.
- Verify the catalogue line by line. Compare each test, unit, reference range and critical limit with the source and have a senior scientist sign it.
- Connect and test every instrument. Send worklists and receive results for every test the instrument runs. Include repeat, dilution and error flags.
- Script scenarios from real days. Cover routine, urgent, add-on, rejected and recollected specimens, critical results, corrections and send-outs.
- Rehearse downtime. Practise the manual procedure and the back-entry that follows.
Phase 3: run in parallel and reconcile
Run both systems on the same specimens for an agreed period. The point is not to find that the systems agree. It is to find where they do not, and why, while the old system is still the system of record.
- Result values match for the same specimens, within the tolerance agreed with the laboratory director.
- Abnormal and critical flags fire in the same cases, and the critical call procedure works.
- Turnaround time is no worse than before for the main workflows.
- Printed and electronic reports carry the same content, in the agreed languages.
- Every difference is logged with a cause and an owner, and none is left open at cut-over.
Phase 4: cut over by workflow, not by date
Choose the cut-over by what is ready, not only by what is scheduled. Many laboratories move one bench or one patient group at a time, keep the old system readable, and freeze catalogue changes for the period.
- Go and no-go criteria are written and agreed before the day.
- The old system is switched to read-only at a defined time, not left open for new orders.
- Super-users are present on every shift for the first days.
- The laboratory director and the clinical lead have named the person who decides to proceed or stop.
Keep the clinicians informed
Clinicians feel a laboratory change first as a missing or delayed result. Tell them what is changing, when, and how to raise a problem. Give them one contact and a short written note on what to expect: new report layouts, new order screens, and what to do if a result is late.
- Name a single laboratory contact for clinicians for the transition period.
- Share the new report layout before go-live, in the languages the clinicians use.
- Confirm how critical results will be phoned or flagged on the first day.
Set rollback criteria before you start
Decide in advance what would make you step back. Typical triggers are a critical result that did not reach the clinician, repeated identification errors, or an instrument interface that cannot be restored within a defined time. Writing the criteria down turns a stressful judgement call on the day into a decision already taken.
Prepare people as carefully as systems
Train by role: those who collect, those who run instruments, those who verify and release, and those who manage quality. Short sessions at the bench with real specimens work better than a single classroom day. Plan floor support for the first weeks and make it easy to raise a problem.
Common pitfalls
- Cutting over the catalogue and not the workflow. The tests load, but labels, add-on tests and reports do not.
- Underestimating instrument interfaces. Each analyzer is a small project of its own.
- Skipping the parallel run for low-volume benches. Low volume hides mapping errors until the day they matter.
- No owner for open differences. A list of differences with no names does not shrink.
After go-live: the first thirty days
Review errors, rejected specimens, turnaround times and open mapping issues every day at first, then weekly. Decide when the old system is retired and who keeps access to historical data. Link the lessons to the integration readiness checklist and the analyzer integration checklist so the next change starts from a better register.
Frequently asked questions
Should historical results be migrated?
Decide by use. Clinicians usually need recent results beside new ones. Older results can stay readable in the old system under agreed access rules, or be migrated for a defined period.
Can we cut over one bench or department at a time?
Often yes, provided identification, reports and critical-result handling work the same way across the benches that run on different systems during the transition.
What should a parallel run prove?
That results, flags, reports and turnaround match for the same specimens, that every difference has a cause and an owner, and that downtime procedures work.
Related Ventrecs pages
- Ventrecs Lab Specimens, results and instrument connectivity in one governed workflow.
- Integrations How Ventrecs scopes, tests and supports each connection.
- Solutions by provider type Medical centres, laboratories, imaging centres, pharmacy groups and hospital networks.
- Security and delivery Access control, audit, hosting options and the phased delivery method.
Planning a deployment?
Tell us about your laboratory: tests, analyzers and current LIS. We can map what has to be agreed before a phased cut-over.
More insights
- Laboratory analyzer integration checklist: what to define before connecting your LIS Most analyzer problems come from details nobody wrote down. Use this checklist to define each instrument connection before configuration starts.
- Healthcare integration readiness before go-live before go-live Most delays in a healthcare deployment come from interfaces nobody scoped. Use this guide to agree each connection, its owner and how it is tested before go-live.
- Hospital information system RFP checklist: how to evaluate HIS, EMR, LIS, RIS and pharmacy requirements A good RFP asks for evidence, not features. Use this checklist to define scope, requirements, demonstrations and scoring before you issue it.